
Photography is the capturing of light, and it wasn’t until recently that we became convinced this meant each of us owning a hefty DSLR with a signature camera strap and too many lenses to fit in a duffel bag. Instead of dragging such a digital beast out and about with you, try harkening back to the origins of photography with a photo-paper-exposing, DIY pinhole camera. Remember the magic of not knowing what a picture you took is going to look like, or if it will be even better than you could imagine. Below is a diagram and list of directions from local photography gurus Analog Sunshine Recorders.
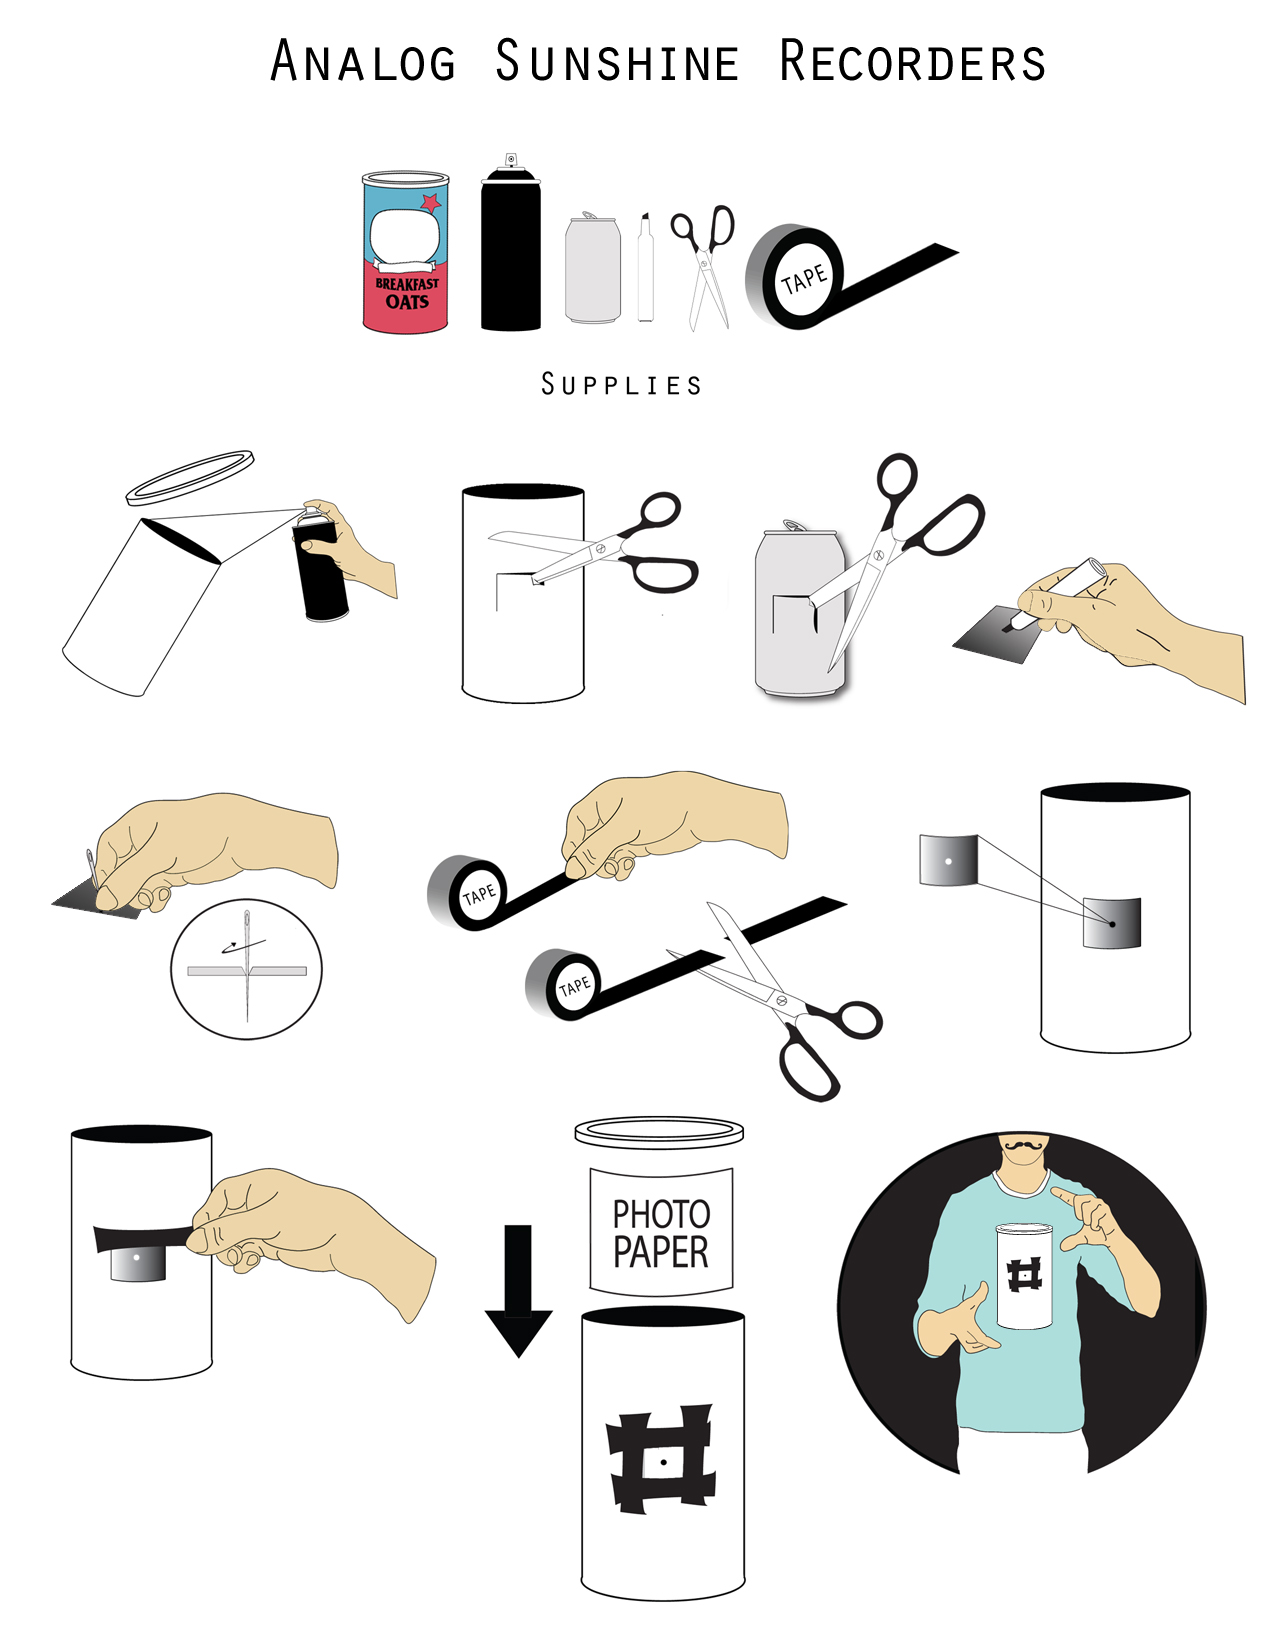
WHAT YOU’LL NEED:
No. 10 needle
Oatmeal can
Black spray paint
Soda can
Black permanent marker
Scissors
Black tape
Photographic paper (Treehouse has B&W, for one)
DIRECTIONS:
1. Spray inside of oatmeal can black. Let paint dry.
2. Cut 1” x 1” square from the center of the oatmeal can.
3. Cut a 1-3/4” x 1-3/4” square from the center of the soda can.
4. Use a black marker to color the soda can cutout. Color both sides.
5. Use a no. 10 needle to puncture a small hole in the soda can cutout.
6. Cut 4 pieces of black tape.
7. Place soda can cutout (aperture plate) over hole in oatmeal can.
8. Tape aperture plate onto oatmeal can.
9. Go into a dark room (photo paper is light sensitive!).
10. Insert photo paper inside oatmeal can towards the back of the can and behind the aperture plate. Be sure to face photo paper emulsion side out.
11. Cover aperture plate with tape until ready to shoot photo.
12. Decorate your camera. We always decorate ours.
13. Replace lid on oatmeal can and you are ready to shoot! Photographic paper takes about 1-2 minutes to be fully exposed.
14. Once you uncover the pinhole (which is how you expose your paper), make sure not to bump your camera or image will be blurry.
15. The trick to this process is the first image you will get is a negative, so the inverse light of what you see in front of you. One way to get a positive is to place another piece of photographic paper inside your pinhole camera, and then take a photo of your negative. This will reverse the light and naturally process your image. For an incredible example of this, check out the Afghan Box Camera Project video.
16. Try and try again–and have fun!